
You know the sound. That soft, crinkly rustle of wax paper. The gentle *thunk* as you pry open the lid of a blue tin, decorated with windmills and cozy cottages. And then… the reveal. A treasure trove of golden, delicate cookies, each one a tiny, buttery sculpture promising pure, uncomplicated joy.
Forget everything you thought you knew about that iconic tin. Today, we’re not just opening it; we’re baking the magic from scratch. We’re capturing that crisp snap, that melt-in-your-mouth tenderness, and that haunting whisper of real vanilla. This isn’t just a recipe; it’s a passport to a simpler, sweeter moment.
The Tin is a Trophy, The Cookie is a Legend
Why bother, you ask? When you can make your own Danish Butter Cookies in Tin with Vanilla, you control the narrative. No more mysterious shortening, no more vague “flavorings.” Just honest-to-goodness butter, sugar, and flour performing a ballet of simplicity. The tin becomes a badge of honor—proof that you crafted something timeless with your own two hands. It’s the ultimate edible gift that whispers, “I have my life together,” even if you baked them in your pajamas.
Your Mission, Should You Choose to Accept It: The Flavor Makers
Gather your agents. This mission requires precision, but the payoff is epic.
- Unsalted Butter (1 cup / 225g), softened: This is the starring role. Get the good stuff. Its flavor is the soul of the cookie.
- Granulated Sugar (1/2 cup / 100g): For sweetness and that essential crisp edge.
- Powdered Sugar (1/4 cup / 30g): The secret agent for tenderness. It dissolves instantly, creating a finer, more delicate crumb.
- Pure Vanilla Extract (1 ½ tsp): Not imitation. We’re going for depth, not just a whisper. This is the aromatic heart.
- All-Purpose Flour (2 cups / 250g): The reliable foundation. Spoon and level it for accuracy—no packing!
- Fine Sea Salt (1/4 tsp): The flavor enhancer. It makes the butter sing and the vanilla pop.
The Not-So-Secret Science of Butter Temperature
Let’s talk butter. Too cold, and your dough will be a crumbly, rebellious mess. Too warm, and your cookies will spread into sad, greasy puddles. We want “softened.” Picture this: you press your finger into the stick, and it leaves a clear indent without sinking all the way through. It should be cool, pliable, and smooth. This is the non-negotiable foundation for the perfect easy Danish Butter Cookies in Tin with Vanilla texture.
The Dance of Dough: Let’s Get Crafting
Ready? Preheat your oven to 350°F (175°C). Line your baking sheets with parchment paper. Let’s create.
Step 1: The Creaming Ceremony. In a large bowl, beat the softened butter with both sugars until the mixture is pale, fluffy, and utterly creamy. This isn’t just mixing; you’re incorporating tiny air bubbles that will give the cookies lift. Scrape down the bowl. Beat in the vanilla until it’s one harmonious, fragrant entity.
Step 2: The Gentle Merge. In a separate bowl, whisk the flour and salt. Now, with the mixer on low, gradually add the dry ingredients to the butter mixture. Mix just until the flour disappears. Overmixing is the enemy of tenderness—we’re forming a dough, not building gluten muscles.
Step 3: Shape Your Destiny. Here’s where the fun begins. You can pipe the dough using a star tip for those classic ridged circles. Pro tip: Chill your piping bag for 10 minutes first to keep the dough firm. Or, for a truly rustic, authentic look, roll teaspoons of dough into small logs and gently press with a fork. Both methods are glorious.
Step 4: The Golden Transformation. Bake for 12-15 minutes, rotating the sheet halfway through. You’re looking for the edges to be just set and very lightly golden. The centers may still look soft—they’ll firm up as they cool. This is the key to the “melt-in-your-mouth” quality. Let them cool on the sheet for 5 minutes before transferring to a wire rack.
How to Absolutely, Positively Ruin a Perfect Cookie (A Cautionary Tale)
I believe in learning from mistakes, preferably other people’s. Let’s avoid these classic blunders.
Butter Blunder: Using melted or oily butter. It’s a one-way ticket to Flat Cookie City. Population: Your disappointment.
Flour Fiasco: Scooping the flour directly from the bag with your measuring cup. You’ll pack in up to 25% more flour, resulting in dry, tough hockey pucks. Spoon and level, friends. Always.
Vanilla Vexation: Using that little brown bottle of “imitation” stuff. For a cookie where vanilla is a headline flavor, it’s worth the splurge for the real deal. Trust me.
The Overbake Oops: Waiting for the cookies to turn brown all over. They continue to cook on the hot tray! Pull them when they look *almost* underdone. They’ll perfect themselves as they cool.
Serving Vibes: More Than Just a Cookie
These cookies are a mood. They’re the elegant finale to a dinner party, stacked neatly on a vintage plate with a dusting of powdered sugar. They’re the companion to a steaming cup of afternoon tea, perfect for a solitary moment of peace. And of course, they’re the ultimate gift. Tuck them into a clean, decorative tin (the internet is full of beautiful options!) layered with wax paper. It’s a gift that feels both nostalgic and incredibly thoughtful. For more elegant treat ideas, explore our full collection of classic recipes.
Leftovers? A Beautiful Problem to Have
Ha! As if. But if you somehow have willpower of steel, these cookies store spectacularly. Once completely cool, layer them in an airtight container (hello, classic tin!) at room temperature for up to 2 weeks. They actually improve in flavor after a day or two as the vanilla mellows and deepens.
Want to get a head start on holiday gifting? You can absolutely freeze the shaped, unbaked dough on a tray, then transfer to a freezer bag. Bake straight from frozen, adding just a minute or two to the baking time. Or, freeze the baked, cooled cookies. They’ll keep their texture beautifully for a couple of months.
Your Danish Butter Cookie Conundrums, Solved
How do I freeze Danish Butter Cookies in Tin with Vanilla?
For the baked cookies, ensure they are 100% cool. Layer them in your tin with sheets of parchment or wax paper between layers. Seal the tin tightly and freeze for up to 3 months. Thaw at room temperature, still sealed, to prevent condensation.
What are the calories in Danish Butter Cookies in Tin with Vanilla?
It varies by size, but a typical cookie from this recipe contains about 70-80 calories. They’re rich, so one or two is usually enough to satisfy that buttery craving. It’s all about savoring the quality, not the quantity!
My dough is too soft to pipe! Help!
No panic. Simply scrape the dough onto a sheet of plastic wrap, shape it into a log, wrap tightly, and chill for 30-60 minutes. You can then slice and bake beautiful round cookies, or the dough will be firm enough to pipe. The chill is your friend.
Can I add other flavors?
Absolutely! After mastering the classic, try adding a teaspoon of lemon zest, a hint of almond extract (½ tsp), or even a sprinkle of pearl sugar on top before baking. The vanilla base is a perfect canvas.
Why are mine not as crispy?
This usually traces back to butter that was too warm or underbaking. Ensure your butter is just softened, not greasy, and trust the visual cues for doneness (set, pale golden edges). They crisp up as they cool completely.
So there you have it. The secret to the world’s most famous tin is now in your hands. It’s a simple alchemy of good ingredients and a little patience. Now go forth, bake, and create that iconic rustle and *thunk* for someone you love—even if that someone is you. For a completely different kind of delicious project, why not try a refreshing homemade smoothie to balance out all that baking? Happy creating!
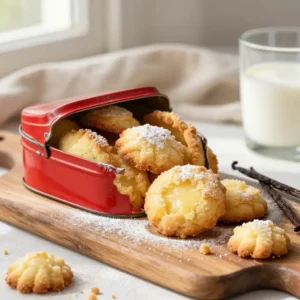
Danish Butter Cookies in Tin with Vanilla
Ingredients
Ingredients
- 1 cup unsalted butter softened to room temperature
- 0.75 cup granulated sugar
- 1 tsp vanilla extract or vanilla bean paste for specks
- 2 cups all-purpose flour
- 0.5 tsp baking powder
- 0.25 tsp salt
- 1 large egg
- 2 tbsp whole milk or cream
- 2 tbsp coarse sugar or pearl sugar for sprinkling (optional)